Canonical URL : Gerrit에 접속하기 위한 URL. 만약 외부 접속을 막고 싶다면, 호스트이름을 localhost로 변경한다. 아래 예에서 처럼 'bungslxubu51'의 경우는, 외부에서 접속이 되지 않을 수 있다.
Plugins : 모든 플러그인을 설치하기 위해 'Y'로 입력
junggu.lee@bungslxubu51:~$ java -jar ~/bin/gerrit-3.5.1.war init -d ~/work/gerrit_standalone
Using secure store: com.google.gerrit.server.securestore.DefaultSecureStore
[2022-04-22 07:30:56,181] [main] INFO  com.google.gerrit.server.config.GerritServerConfigProvider : No /home/junggu.lee/work/gerrit_standalone/etc/gerrit.config; assuming defaults

*** Gerrit Code Review 3.5.1
***

Create '/home/junggu.lee/work/gerrit_standalone' [Y/n]?

*** Git Repositories
***

Location of Git repositories   [git]:

*** JGit Configuration
***

Auto-configured "receive.autogc = false" to disable auto-gc after git-receive-pack.

*** Index
***

Type                           [lucene]:

*** User Authentication
***

Authentication method          [openid/?]:
Enable signed push support     [y/N]?
Use case insensitive usernames [Y/n]?

*** Review Labels
***

Install Verified label         [y/N]?

*** Email Delivery
***

SMTP server hostname           [localhost]:
SMTP server port               [(default)]:
SMTP encryption                [none/?]:
SMTP username                  :

*** Container Process
***

Run as                         [junggu.lee]:
Java runtime                   [/usr/lib/jvm/java-11-openjdk-amd64]:
Copy gerrit-3.5.1.war to /home/junggu.lee/work/gerrit_standalone/bin/gerrit.war [Y/n]?
Copying gerrit-3.5.1.war to /home/junggu.lee/work/gerrit_standalone/bin/gerrit.war

*** SSH Daemon
***

Listen on address              [*]:
Listen on port                 [29418]:
Generating SSH host key ... rsa... ed25519... ecdsa 256... ecdsa 384... ecdsa 521... done

*** HTTP Daemon
***

Behind reverse proxy           [y/N]?
Use SSL (https://)             [y/N]?
Listen on address              [*]:
Listen on port                 [8080]: 8081
Canonical URL                  [http://bungslxubu51:8081/]:

*** Cache
***


*** Plugins
***

Installing plugins.
Install plugin codemirror-editor version v3.5.1 [y/N]? y
Installed codemirror-editor v3.5.1
Install plugin commit-message-length-validator version v3.5.1 [y/N]? y
Installed commit-message-length-validator v3.5.1
Install plugin delete-project version v3.5.1 [y/N]? y
Installed delete-project v3.5.1
Install plugin download-commands version v3.5.1 [y/N]? y
Installed download-commands v3.5.1
Install plugin gitiles version v3.5.1 [y/N]? y
Installed gitiles v3.5.1
Install plugin hooks version v3.5.1 [y/N]? y
Installed hooks v3.5.1
Install plugin plugin-manager version v3.5.1 [y/N]? y
Installed plugin-manager v3.5.1
Install plugin replication version v3.5.1 [y/N]? y
Installed replication v3.5.1
Install plugin reviewnotes version v3.5.1 [y/N]? y
Installed reviewnotes v3.5.1
Install plugin singleusergroup version v3.5.1 [y/N]? y
Installed singleusergroup v3.5.1
Install plugin webhooks version v3.5.1 [y/N]? y
Installed webhooks v3.5.1
Initializing plugins.

============================================================================
Welcome to the Gerrit community

Find more information on the homepage: https://www.gerritcodereview.com
Discuss Gerrit on the mailing list: https://groups.google.com/g/repo-discuss
============================================================================
Initialized /home/junggu.lee/work/gerrit_standalone
Init complete, reindexing accounts,changes,groups,projects with: reindex --site-path /home/junggu.lee/work/gerrit_standalone --threads 1 --index accounts --index changes --index groups --index projects --disable-cache-statsReindexed 0 documents in accounts index in 0.0s (0.0/s)
Index accounts in version 11 is ready
Reindexing groups:      100% (2/2)
Reindexed 2 documents in groups index in 0.3s (5.8/s)
Index groups in version 8 is ready
Reindexing changes: Slicing projects: 100% (2/2), done
Reindexed 0 documents in changes index in 0.5s (0.0/s)
Index changes in version 71 is ready
Reindexing projects:    100% (2/2)
Reindexed 2 documents in projects index in 0.1s (35.7/s)
Index projects in version 4 is ready
Executing /home/junggu.lee/work/gerrit_standalone/bin/gerrit.sh start
Starting Gerrit Code Review: WARNING: Could not adjust Gerrit's process for the kernel's out-of-memory killer.
         This may be caused by /home/junggu.lee/work/gerrit_standalone/bin/gerrit.sh not being run as root.
         Consider changing the OOM score adjustment manually for Gerrit's PID=4136478 with e.g.:
         echo '-1000' | sudo tee /proc/4136478/oom_score_adj
OK
Waiting for server on bungslxubu51:8081 ... OK
Opening http://bungslxubu51:8081/#/admin/projects/ ...OK
또 다른 방법으로는 기본값으로 설정하는 옵션인 --batch 을 제거하면 각종 설정을 개별적으로 지정할 수 있다. ( Standalone 설치 )
내 경우에 8080 포트 충돌을 피하기 위해, Listen on port 부분을 8081 포트로 설정하고, 나머지 설정은 기본값으로 두었다.
junggu.lee@bungslxubu51:~$ java -jar ~/bin/gerrit-3.5.1.war init -d $GERRIT_SITE
Using secure store: com.google.gerrit.server.securestore.DefaultSecureStore
[2022-04-2004:52:39,628] [main] INFO com.google.gerrit.server.config.GerritServerConfigProvider : No /home/junggu.lee/work/gerrit_quickstart/etc/gerrit.config; assuming defaults
*** Gerrit Code Review 3.5.1
***
Create '/home/junggu.lee/work/gerrit_quickstart' [Y/n]?
*** Git Repositories
***
Location of Git repositories [git]:
*** JGit Configuration
***
Auto-configured "receive.autogc = false" to disable auto-gc after git-receive-pack.
*** Index
***
Type [lucene]:
*** User Authentication
***
Authentication method [openid/?]:
Enable signed push support [y/N]?
Use case insensitive usernames [Y/n]?
*** Review Labels
***
Install Verified label [y/N]?
*** Email Delivery
***
SMTP server hostname [localhost]:
SMTP server port [(default)]:
SMTP encryption [none/?]:
SMTP username :
*** Container Process
***
Run as [junggu.lee]:
Java runtime [/usr/lib/jvm/java-11-openjdk-amd64]:
Copy gerrit-3.5.1.war to /home/junggu.lee/work/gerrit_quickstart/bin/gerrit.war [Y/n]?
Copying gerrit-3.5.1.war to /home/junggu.lee/work/gerrit_quickstart/bin/gerrit.war
*** SSH Daemon
***
Listen on address [*]:
Listen on port [29418]:
Generating SSH host key ... rsa... ed25519... ecdsa 256... ecdsa 384... ecdsa 521... done
*** HTTP Daemon
***
Behind reverse proxy [y/N]?
Use SSL (https://) [y/N]?
Listen on address [*]:
Listen on port [8080]: 8081
Canonical URL [http://bungslxubu51:8081/]:
*** Cache
***
*** Plugins
***
Installing plugins.
Install plugin codemirror-editor version v3.5.1 [y/N]?
Install plugin commit-message-length-validator version v3.5.1 [y/N]?
Install plugin delete-project version v3.5.1 [y/N]?
Install plugin download-commands version v3.5.1 [y/N]?
Install plugin gitiles version v3.5.1 [y/N]?
Install plugin hooks version v3.5.1 [y/N]?
Install plugin plugin-manager version v3.5.1 [y/N]?
Install plugin replication version v3.5.1 [y/N]?
Install plugin reviewnotes version v3.5.1 [y/N]?
Install plugin singleusergroup version v3.5.1 [y/N]?
Install plugin webhooks version v3.5.1 [y/N]?
Initializing plugins.
No plugins found with init steps.
============================================================================
Welcome to the Gerrit community
Find more information on the homepage: https://www.gerritcodereview.com
Discuss Gerrit on the mailing list: https://groups.google.com/g/repo-discuss
============================================================================
Initialized /home/junggu.lee/work/gerrit_quickstart
Init complete, reindexing accounts,changes,groups,projects with: reindex --site-path /home/junggu.lee/work/gerrit_quickstart --threads 1 --index accounts --index changes --index groups --index projects --disable-cache-statsReindexed 0 documents in accounts index in 0.0s (0.0/s)
Index accounts in version 11 is ready
Reindexing groups: 100% (2/2)
Reindexed 2 documents in groups index in 0.3s (6.3/s)
Index groups in version 8 is ready
Reindexing changes: Slicing projects: 100% (2/2), done
Reindexed 0 documents in changes index in 0.0s (0.0/s)
Index changes in version 71 is ready
Reindexing projects: 100% (2/2)
Reindexed 2 documents in projects index in 0.0s (40.8/s)
Index projects in version 4 is ready
Executing /home/junggu.lee/work/gerrit_quickstart/bin/gerrit.sh start
Starting Gerrit Code Review: WARNING: Could not adjust Gerrit's process for the kernel's out-of-memory killer.
This may be caused by /home/junggu.lee/work/gerrit_quickstart/bin/gerrit.sh not being run as root.
Consider changing the OOM score adjustment manually for Gerrit's PID=870815 with e.g.:
echo '-1000' | sudo tee /proc/870815/oom_score_adj
OK
Waiting for server on bungslxubu51:8081 ... OK
Opening http://bungslxubu51:8081/#/admin/projects/ ...OK
그리고 내부 테스트를 목적으로 하는 경우, 외부에서 Gerrit에 접속하는 것을 막을 수 있다.
이 경우, etc/gerrit.conifg 파일의 httpd.listenUrl을 localhost로 수정하면 된다. ( Gerrit의 Quickstart 문서 참조 )
Gerrit에 문제가 생겼을때는 에러 로그를 살펴본다. 에러 로그는 logs/error_log 이다.
다음은 내 에러 및 처리하는 과정을 표시하였다.
junggu.lee@bungslxubu51:~$cat~/work/gerrit_quickstart/logs/error_log
[2022-04-20T02:39:01.669Z] [main] INFO com.google.gerrit.server.git.WorkQueue :Addingmetricsfor'SshCommandStart'queue
[2022-04-20T02:39:02.037Z] [main] INFO com.google.gerrit.server.git.WorkQueue :Addingmetricsfor'SSH-Stream-Worker'queue
[2022-04-20T02:39:02.039Z] [main] INFO com.google.gerrit.server.git.WorkQueue :Addingmetricsfor'SSH-Interactive-Worker'queue
[2022-04-20T02:39:02.039Z] [main] INFO com.google.gerrit.server.git.WorkQueue :Addingmetricsfor'SSH-Batch-Worker'queue
[2022-04-20T02:39:02.040Z] [main] INFO com.google.gerrit.server.git.WorkQueue :Addingmetricsfor'MigrateExternalIdCase'queue
[2022-04-20T02:39:02.052Z] [main] WARN com.google.gerrit.server.config.GitwebCgiConfig :gitwebnotinstalled(no/usr/lib/cgi-bin/gitweb.cgifound)
[2022-04-20T02:39:02.726Z] [main] INFO org.eclipse.jetty.util.log :Logginginitialized@5624mstoorg.eclipse.jetty.util.log.Slf4jLog
[2022-04-20T02:39:02.854Z] [main] INFO com.google.gerrit.server.git.SystemReaderInstaller :SetJGit'sSystemReadertoreadsystemconfigfrom/home/junggu.lee/work/gerrit_quickstart/etc/jgit.config
[2022-04-20T02:39:02.858Z] [main] INFO com.google.gerrit.server.git.LocalDiskRepositoryManager :Defaultingcore.streamFileThresholdto1001m
[2022-04-20T02:39:03.261Z] [main] INFO com.google.gerrit.server.plugins.PluginLoader :Loadingpluginsfrom/home/junggu.lee/work/gerrit_quickstart/plugins
[2022-04-20T02:39:03.275Z] [main] INFO com.google.gerrit.server.config.ScheduleConfig :Noscheduleconfigurationfor"accountDeactivation".
[2022-04-20T02:39:03.313Z] [main] INFO com.google.gerrit.sshd.SshDaemon :StartedGerritAPACHE-SSHD-2.6.0on*:29418
[2022-04-20T02:39:03.316Z] [main] INFO org.eclipse.jetty.server.Server :jetty-9.4.36.v20210114;built:2021-01-14T16:44:28.689Z;git:238ec6997c7806b055319a6d11f8ae7564adc0de;jvm11.0.14.1+1-Ubuntu-0ubuntu1.20.04
[2022-04-20T02:39:03.342Z] [main] INFO org.eclipse.jetty.server.session :DefaultSessionIdManagerworkerName=node0
[2022-04-20T02:39:03.343Z] [main] INFO org.eclipse.jetty.server.session :NoSessionScavengerset,usingdefaults
[2022-04-20T02:39:03.344Z] [main] INFO org.eclipse.jetty.server.session :node0Scavengingevery600000ms
[2022-04-20T02:39:03.407Z] [main] INFO org.eclipse.jetty.server.handler.ContextHandler :Startedo.e.j.s.ServletContextHandler@75452b01{/,null,AVAILABLE}
[2022-04-20T02:39:03.412Z] [main] ERROR com.google.gerrit.pgm.Daemon :Unabletostartdaemonjava.lang.IllegalStateException:CannotstartHTTPdaemonatcom.google.gerrit.pgm.http.jetty.JettyServer$Lifecycle.start(JettyServer.java:109)atcom.google.gerrit.lifecycle.LifecycleManager.start(LifecycleManager.java:95)atcom.google.gerrit.pgm.Daemon.start(Daemon.java:386)atcom.google.gerrit.pgm.Daemon.run(Daemon.java:285)atcom.google.gerrit.pgm.util.AbstractProgram.main(AbstractProgram.java:61)atjava.base/jdk.internal.reflect.NativeMethodAccessorImpl.invoke0(NativeMethod)atjava.base/jdk.internal.reflect.NativeMethodAccessorImpl.invoke(NativeMethodAccessorImpl.java:62)atjava.base/jdk.internal.reflect.DelegatingMethodAccessorImpl.invoke(DelegatingMethodAccessorImpl.java:43)atjava.base/java.lang.reflect.Method.invoke(Method.java:566)atcom.google.gerrit.launcher.GerritLauncher.invokeProgram(GerritLauncher.java:224)atcom.google.gerrit.launcher.GerritLauncher.mainImpl(GerritLauncher.java:120)atcom.google.gerrit.launcher.GerritLauncher.main(GerritLauncher.java:65)atMain.main(Main.java:28)Caused by: java.io.IOException:Failedtobindto0.0.0.0/0.0.0.0:8080atorg.eclipse.jetty.server.ServerConnector.openAcceptChannel(ServerConnector.java:349)atorg.eclipse.jetty.server.ServerConnector.open(ServerConnector.java:310)atorg.eclipse.jetty.server.AbstractNetworkConnector.doStart(AbstractNetworkConnector.java:80)atorg.eclipse.jetty.server.ServerConnector.doStart(ServerConnector.java:234)atorg.eclipse.jetty.util.component.AbstractLifeCycle.start(AbstractLifeCycle.java:73)atorg.eclipse.jetty.server.Server.doStart(Server.java:401)atorg.eclipse.jetty.util.component.AbstractLifeCycle.start(AbstractLifeCycle.java:73)atcom.google.gerrit.pgm.http.jetty.JettyServer$Lifecycle.start(JettyServer.java:95)...12moreCaused by: java.net.BindException:Addressalreadyinuseatjava.base/sun.nio.ch.Net.bind0(NativeMethod)atjava.base/sun.nio.ch.Net.bind(Net.java:459)atjava.base/sun.nio.ch.Net.bind(Net.java:448)atjava.base/sun.nio.ch.ServerSocketChannelImpl.bind(ServerSocketChannelImpl.java:227)atjava.base/sun.nio.ch.ServerSocketAdaptor.bind(ServerSocketAdaptor.java:80)atorg.eclipse.jetty.server.ServerConnector.openAcceptChannel(ServerConnector.java:344)...19more
Gerrit에서는 기본 설치시에 8080포트를 사용하는데, 이미 8080포트를 사용하고 있어서 사용할 수가 없다.
8080 포트가 사용되고 있는지 확인해보았다.
junggu.lee@bungslxubu51:~$ netstat -nap | grep 8080
(Not all processes could be identified, non-owned process info
 will not be shown, you would have to be root to see it all.)
tcp        0      0 0.0.0.0:8080            0.0.0.0:*               LISTEN      -
tcp        0      0 127.0.0.1:58080         127.0.0.1:9099          TIME_WAIT   -
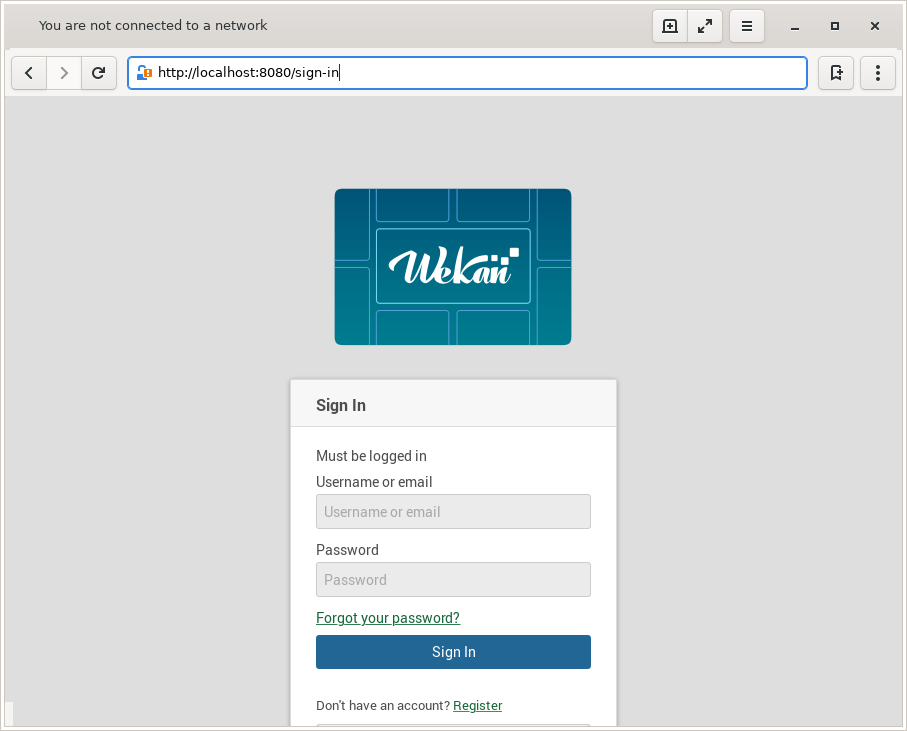
Gerrit의 동작을 확인하기 위해서 가벼운 브라우저 ( light web browser )인 midori를 설치했는데, 이 midori에서 8080 포트를 사용하고 있었다.